Quantcast
Channel: Healthy Cooking Recipe | Bengali Food Recipes
Viewing all 105 articles
Browse latest View live

Famous Doi Potol or Dahi Parwal Bengali Veg Recipe

$
0
0

Doi Potol or Dahi Parwal Bengali Vegetarian Recipe:

doi-potol-dahi-parwal-bengali-recipe


Doi Potol or Dahi Parwal is one of the best Bengali recipe. Doi Potol or Dahi Parwal recipe is very simple and tasty. Dahi Potol/ Parwal is a rich spicy recipe cooked with thick tasty gravy. Dahi Potol/ Parwal recipe is very easy to cook and it tastes delicious. I will share this recipe step by step with images.


“Potol” is a kind of vegetable. In English “Doi” means Yogurt/ curd and “Potol” means pointed ground. It is very tasty vegetable. Pointed ground is very famous and healthy vegetable in west Bengal and Bangladesh. It is available in almost all seasons, but the best time is summer. Nowadays, it is available in the market for whole year. We can use the green branches and leaves also as a vegetable. There are so many organic benefits in the leaves of pointed ground.

Doi potol recipe is very special for me because I learned from my mother and I want to dedicate this recipe to my mother. My mother is expert to make this recipe. Bengali people love potol or Parwal too much, they have verities of recipes like Doi Potol, Potol Vaja, Potoler Torkari, Aloo Potoler Dalna, Potol Korma recipe, Potol Posto, stuffed Potol, Potol Dolma, Aloo Potol Rasa etc. Doi potol or Dahi Parwal is a delicious Indian recipe also, served as a Curries.

Watch My another Famous Recipe: Doi Begun or Eggplant Yogurt Recipe.

Ingredients for Dahi Parwal or Doi Potol:


doi-potol-dahi-parwal-bengali-recipe

  • Yogurt 1/2 cup
  • Parwal 250 grams (Pointed Gourd)
  • Onion paste 1/2 cup
  • Oil 1/2 cup
  • Cloves 4-5
  • Green cardamom 3-4
  • Cinnamon 1-2
  • sugar to taste
  • Salt to taste
  • Turmeric powder 1/2 teaspoon
  • Red chili powder 1 teaspoon
  • Ginger-garlic paste 1 teaspoon

Watch This YouTube Video


How to make Doi Potol/ Dahi Parwal?

* Wash the Potol/ Parwal in a fresh water.


doi-potol-dahi-parwal-bengali-recipe_01

* Scrap all the Parwal vertically/ lengthwise leaving streaks of skin on alternate strokes.


doi-potol-dahi-parwal-bengali-recipe_02

* Chop off the Parwal pointed end at both side.


doi-potol-dahi-parwal-bengali-recipe_03

* Mix salt and turmeric and keep it side.
* Heat oil in a non stick pan or kadai.
* Fry the Parwal till little brown color.


doi-potol-dahi-parwal-bengali-recipe_04

* Transfer cooked Potol/ Parwal in serving bowl and keep aside.
* Now add Cloves, Cinnamon, Green cardamom, stir it gently for good smell.
* Add onion paste, Ginger-garlic paste and saute till the raw smell disappears.
* Now add Red chili powder, mix it well.


doi-potol-dahi-parwal-bengali-recipe_05

* Add little sugar to taste and color for the gravy.
* Add salt to taste.
* Add yogurt and slightly saute this mixture, simmer it for 3 minutes.


doi-potol-dahi-parwal-bengali-recipe_06

* Now gravy is ready.
* Now add all the Potol/ Parwal one by one and mix it well with the gravy.


doi-potol-dahi-parwal-bengali-recipe_06

* Let it simmer for 5 minutes.
* Dahi Parwal is ready.


doi-potol-dahi-parwal-bengali-recipe_07

Take it out in a serving bowl and serve it hot.

There are different types of recipe with Potol like Potol Korma Recipe, Potol Posto, Aloo Potol Recipe, Potol Fry etc. You can watch my another famous recipe Aloo Potoler Dalna.

Healthy Tips Of the Day about Yogurt:
Doctors and Nutritionist are always advice us to eat the yogurt. Mainly in India (South India) always take the yogurt after the meal. There is no doubt yogurt is Nutritious and healthy food. It has vitamin (Vitamin B Complex), Calcium and Phosphorus etc. it is nutritious food like milk. It is more nutritious than even milk is regarded as. It has no carbohydrate, sugar and no trans fat. This helps us to prevent and cure.
It is control our body temperature. So eating yogurt is better in the summer.
To reduce weight and low-fat eat yogurt with no sugar.
Read more about it Click Here.

Capsicum Egg Cutlet Recipe| Crispy Capsicum Egg Roll Recipe

$
0
0

Crispy Capsicum Egg Cutlet Recipe or Delicious Capsicum Egg Roll Recipe:


delicious-capsicum-egg-cutlet-recipe

How to make crispy Capsicum Egg Cutlet Recipe or Delicious Capsicum Egg Roll Recipe? This Capsicum Cutlet Recipe is very tasty; it is loaded with seasoned raw vegetables and egg. Egg Roll recipe is one of the most popular street food. Mostly egg roll is stuffed with chicken, eggs, paneer, season vegetables and onion, cucumber etc. There are so many type of rolls like Egg rolls, chicken and vegetables rolls.

Today I will show you different type of Capsicum Egg Cutlet or Capsicum Egg Roll Recipe, you can also say this capsicum egg roll. I think you will all love my Capsicum cube egg role. It is not looking like roll, it's like a cube but very testy. Try this recipe once, I am sure you can make everybody happy.


I always like to eat nutritious foods in the breakfast. In this case, you can take Capsicum roll without any hassle. You can eat it as a lunch. It is quite healthy for them to eat as meal at the noon who is in diet. The recipe can be made very easily and in a short time. We are all more or less familiar with Capsicum.
 

Watch this Capsicum cube Egg Roll Recipe


·         More Recipes:
·         Doi Potol/ Dahi Parwal Bengali Recipe
·         https://youtu.be/psmmDRC7Cck

·         Paka Kumror bora
·         https://youtu.be/171N4E3Nh2U

·         Special Indian puri with mixed veg curry recipe
·         https://youtu.be/aE8SuAnv6j4

·         How to make Egg fried rice at home?
·         https://youtu.be/8rog_gdkGEo

·         Green Jackfruit/ Echor Malai Curry
·         https://youtu.be/GRa4dG_Ds_c


How to make crispy Capsicum Egg Cutlet Recipe?

Ingredients:

·         Flour 1 cup

·         Sugar to taste

·         Chopped Carrot

·         Chopped Beet

·         Capsicum

·         Salt to taste

·         Sunflower Oil 1 cup

·         Chopped Onion

·         Chopped Green Chili

·         Black Paper Powder to taste

delicious-capsicum-egg-cutlet-recipe


Method for Capsicum Egg Cutlet Recipe step by step with images:

  • Knead a soft dough using maida /flour 2 tbsp oil, 1 tbsp sugar, 1/2 tsp salt and water. Mix everything well and make a soft dough, keep it with cover for 10 minutes.

delicious-capsicum-egg-cutlet-recipe

  • Make two even balls of the dough.
  • Roll each ball to make round parathas but I am using flour/ Maida not oil

delicious-capsicum-egg-cutlet-recipe

  • keep one 1/2 capsicum in the middle of the paratha.

delicious-capsicum-egg-cutlet-recipe

  • Add some salt in the capsicum
  • Add 1 beaten egg in the capsicum

delicious-capsicum-egg-cutlet-recipe

  • Now add pinch of salt with chopped Carrot, chopped Beet, Chopped Onion, Chopped Green Chili. Mix everything well.

delicious-capsicum-egg-cutlet-recipe

  • Take some mixed vegetables and add in the capsicum, make sure beaten egg should not come out from capsicum, add more mixed vegetables as you can.

delicious-capsicum-egg-cutlet-recipe
  • Now smoothly cover the capsicum one by one side with paratha, block the capsicum from all the side, press little in the joint of the paratha, because it should not open when we will fry in the oil. It will look like a nice cube.

delicious-capsicum-egg-cutlet-recipe

delicious-capsicum-egg-cutlet-recipe

delicious-capsicum-egg-cutlet-recipe

  • In the same process make the other one
  • Now it is ready for fry

delicious-capsicum-egg-cutlet-recipe

  • Heat oil in a pan, take 2 cups oil for fry
  • Add cube carefully in the oil

delicious-capsicum-egg-cutlet-recipe

  • Fry both side well, simmer in low heat, let it simmer for 10 minutes
  • Fry until get a brownish color and crunchy, crispy
  • Egg roll is ready, transfer fried roll in serving bowl

delicious-capsicum-egg-cutlet-recipe

  • You can cut the roll from the middle, add some sauce and Black Paper Powder to taste

delicious-capsicum-egg-cutlet-recipe


Something about Capsicum:
A thousand years ago, from around the world are being cultivated Capsicum or sweet pepper. Red, yellow and green Capsicum is available in the market. Another name is Bell Pepper. It is now quite popular in our country as a food material. Although it is not indigenous vegetables but farming in this country is growing slowly. In West Bengal it is use less but it is an important vegetable. The place of origin is the equatorial region of South America.

Health Benefits of Capsicum:
  • Capsicum is quite beneficial to the skin to keep it clean. It is prevent the skin rash and acne.
  • It works to prevent cancer.
  • Capsicum released from any pain. It also works against Migraine, sinus, infection and teeth pain.
  • Capsicum works to fulfill the excess calories of body.
  • As weight increases from high-fat, reducing it.
  • This prevents senile blindness.
  • It is revived the vitamin C in the brain tissue.

Mineral elements:
Mineral elements are available in Capsicum: 10 mg calcium, 380 mg iron, 175 mg of potassium and phosphorus 20 mg. In addition, zinc, copper, manganese, fluoride is found in small amounts.

Eat raw Capsicum prevent diabetes:
Diabetes is a common disease at the present time. It is really hard to get rid of this disease. However, in the current research it is found that Capsicum helps reduce diabetes. Eating of raw Capsicum can reduce diabetes.


Easy Egg fried rice recipe | How to make egg fried rice at home?

$
0
0

How to make Easy Egg fried rice recipe restaurant style at home?


Easy egg fired rice recipe

I will show you how to make Easy egg fried rice recipe in a simple restaurant style at home. With in 20 minutes you can ready Egg fried rice.  It is very quick, easy and popular Chinese recipe but we all love this delicious recipe. We all habituated to eat this popular dish in a restaurant because we afraid to make this at home. Watch my video you can easily prepare Egg fried rice recipe at home.


Easy Egg Fried Rice is Ideal for Breakfast, lunch and dinner also. It is a standard order when we go to Indian-Chinese restaurant. It is very famous for it delicious test and smell.

Watch the video you can understand easily


More Recipes in My YouTube Channel:


Ingredients for Egg fried rice recipe:

  • Boiled Basmati rice 2 cups
  • Beans, Carrot, cauliflower Cut into small pieces 2 cups
  • Finely Chopped tomatoes (without seeds) ½ cup
  • Chopped cabbage ½ cup
  • Chopped onion but long size ½ cup
  • Chopped green chili 2 nos
  • Whole garlic 2-3 nos
  • Cloves 2-3 nos
  • Green cardamom 2-3 nos
  • Cinnamon 2-3 nos
  • Crushed Black pepper ½ tbsp
  • Red chili powder ½ tbsp2 eggs (scramble)
  • Salt to taste
  • Oil 4 tbsp
how-to-make-egg-fried-rice-at-home

How to make Egg Fried rice recipe at home restaurant style?

  • First, heat oil in a pan, take 2 tbsp oil. Add garlic, cloves, cinnamon and saute it for a few minutes.

  • Then add chopped Beans, Carrot, cauliflower, chopped tomatoes, chopped cabbage, chopped onion, Chopped green chili stir on high flame for few minutes. The whole process has to be done on high flame and stirring it continuously.

how-to-make-egg-fried-rice-at-home


  • When vegetables are done add cooked basmati rice and toss it well. Mix the rice with vegetables. Now add salt and sprinkle crushed Black pepper, red chili powder in it. Add soya sauce if you need.
how-to-make-egg-fried-rice-at-home


  • Finally add egg scramble and toss it very well. Keep it in a low flame for 2 minutes and egg fried rice is ready.


Health benefits of Egg:

As a comparison, the egg may be the only source of nutrition. In bachelor life egg is the “National Food” because of easy to cook eggs. Let’s get to know the benefits of eggs because of that you should eat eggs every day! A small egg filled with thousands of vitamins.

  • It has Vitamin B-12which helps to convert the food into the energy or power.
  • It has Vitamin A, which improves eyesight.
  • Vitamin D is only in the egg which helps to reduce muscle pain.
  • It has Vitamin E and prevents skin cancer.
  • It helps to reduce weight.
  • An egg for breakfast every day, your appetite will be less, this means eat less.
  • It is found that eat an egg everyday in the morning can reduce 400 calories in a day.

There are many nutrients in the egg. Egg is the good source of iron, calcium and protein. Eggs help to increase brain activity. Egg protein helps to increase the muscle power and performance of the body.

Eating of raw eggs increases the power?
Many people began to eat raw eggs to increase power. It is absolutely the wrong thing. There is no scientific explanation. This may be rather different diseases. Raw eggs are not easily digestible. Most of the time a type of bacteria is found in the raw egg, named salamonela. Eating raw eggs create stomach disease and there might be even typhoid also.

Never eat half boiled eggs but why?
Many people love to eat eggs. But the thing that is good to eat, there are such things as hazard, like eggs. Egg is the best source of protein. Nine essential amino acids are remain in proper level of eggs. There are small pores in the shell of egg and from there; the bacteria enter in the egg. So, never raw or half-cooked eggs should not eat.


Luchi/ Puri Sabzi Bengali Recipe | How to make Puri/ Luchi Recipe

$
0
0

How to make Puri/ Luchi Recipe Bengali Style?

puri-recipe-with-mixed-veg-curry
Luchi/ Puri Sabzi Bengali Recipe. How to make Puri/ Luchi sabzi Bengali recipe with mixed veg curry. Try this Bengali Style simple and quick Puri Sabzi recipe. Puri recipe is very famous in Bengal. It is so delicious and testy. Mixed vegetable curry recipe for breakfast. You can prepare Puri/Luchi recipe with in 20 minutes.
Actually in Bengali it is called "Luchi".
Watch Puri Recipe In YouTube


More Recipes:
How to make crispy, delicious Egg Rolls/ Capsicum Rolls?
https://youtu.be/QXyaldMEJrY

Doi Potol/ Dahi Parwal Bengali Vegetarian Recipe
https://youtu.be/psmmDRC7Cck

Paka Kumror bora
https://youtu.be/171N4E3Nh2U

Special Indian puri with mixed veg curry recipe
https://youtu.be/aE8SuAnv6j4

How to make Egg fried rice at home? Bengali Style
https://youtu.be/8rog_gdkGEo

Green Jackfruit/ ECHOR Malai Curry
https://youtu.be/GRa4dG_Ds_c

Raw Jackfruit Recipe: Kathal/ Echor Malai Curry Bengali Recipe

$
0
0

Raw Jackfruit Recipe: Kathal/ Echor Malai Curry Bengali Recipe

green-jackfruit-echor-malai-curry-recipe

Today I will show you how to make Raw Jackfruit Recipe? In Bengali it is called Kathal/ Echor Malai Curry. I tried to experiment with Echor Malai Curry. It is very testy and I made it in Bengali Style. I think you all love  Echor/ Kathal Malai Curry. It is little spicy raw Jackfruit curry. This is a totally Bengali veg curry recipe.


Watch more Recipes: Don't miss

Ingredient for Jackfruit Recipe:
·         Salt to taste
·         Turmeric Powder
·         Boiled Green Jack fruit 250 grams with salt and Turmeric Powder
·         Chopped onion
·         Chopped green chilies
·         Chopped Tomatoes
·         Ghee/ clarified butter
·         2-3 Boiled potatoes medium size
·         Corn flour
·         Pea-flour
·         Sunflower oil
·         Roasted cumin powder
·         Roasted coriander powder
·         Chili powder
·         Ginger garlic paste
·         4-5 cardamom
·         4-5 cinnamon stick, 4-5 Cloves
·         1 cup Coconut paste

Boil Jackfruit image:
raw-jackfruit-kathal-recipe-echor-curry-bengali-recipe

How to Cook Raw Jackfruit?


  • First take a big bowl  and put Boiled Green Jack fruit, Boiled potatoes, Chopped onion, Chopped green chilies, Chopped Tomatoes, 1 cup pea-flour, 2-3 spoon  corn flour, salt as per your taste, 1/2 spoon Turmeric Powder , 1/2 Chili powder, 1/2 spoon Roasted cumin powder, 1/2 spoon Roasted coriander powder, now mix everything very well. 

  
raw-jackfruit-kathal-recipe-echor-curry-bengali-recipe
  • Keep it side. Take a dish and put some drop of oil. Now make some round shape gloves with pea-flour otherwise it will stuck in your hand, before making gloves better take some pea-flour in your plum. Try to make it thin not thick gloves. For example you can make it like “Bengali Alur Chop”

raw-jackfruit-kathal-recipe-echor-curry-bengali-recipe


raw-jackfruit-kathal-recipe-echor-curry-bengali-recipe

raw-jackfruit-kathal-recipe-echor-curry-bengali-recipe

  • Heat oil in a frying pan or “karai”.

raw-jackfruit-kathal-recipe-echor-curry-bengali-recipe
  • Now fry the gloves or “Kopta”.

raw-jackfruit-kathal-recipe-echor-curry-bengali-recipe
  • Make it red or light brown color.

raw-jackfruit-kathal-recipe-echor-curry-bengali-recipe
  • Keep it in a bowl.
  • Now add more oil, I used sunflower oil.
  • Now add 4-5 cardamom, 4-5 cinnamon stick, 4-5  Cloves and Seasoning for one minute.
  • After that add Chopped Tomatoes, Chopped onion make it little brown.

raw-jackfruit-kathal-recipe-echor-curry-bengali-recipe
  • After few minutes  add Ginger garlic paste, 1/2 spoon Turmeric Powder, 1/2 Chili powder. Saute it 2 minutes.

raw-jackfruit-kathal-recipe-echor-curry-bengali-recipe
  • Now add 1 cup Coconut paste and salt as per your taste. If you want more gravy add little water and cocked well.

raw-jackfruit-kathal-recipe-echor-curry-bengali-recipe
  • Leave it for 5 minutes.
  •  Now add kopta in the garvy and add 2-3 nos green chili and 2 spoon Ghee. mix it well.

raw-jackfruit-kathal-recipe-echor-curry-bengali-recipe

  • Green jack fruit kopta malai curry is ready.

raw-jackfruit-kathal-recipe-echor-curry-bengali-recipe


Health Benefits of Jack fruit:
Health-Benefits-of-Jack-fruitJack fruit is some kind of yellow sweet summer fruit. It is officially defined as a national fruit of Bangladesh. The jackfruit trees are visible everywhere in Bangladesh. The scientific name is Artocarpus heterophyllus. Raw Jack fruit is called “Echor” in Bengali. Bangladesh and its surrounding areas, particularly in the Indian subcontinent identified as the origin of jackfruit.


 Jackfruit nutrient:
  • Jackfruit is rich in nutrients.
  • It has calcium, potassium, iron, sodium and zinc different types of nutrients.
  • There are plenty of Vitamin A in Jackfruit which prevents night blindness.
  • Vitamin C is a major component of jackfruit. It strengthens our gums.
  • Jackfruit is quite effective to reduce tension and nervousness.
  • Jackfruit prevents indigestion.
  • Jackfruit tree roots relieve asthma.
  • There are huge amounts of manganese minerals in Jackfruit, which helps control blood sugar or sugar.
  • Vitamin B6 reduces the risk of heart disease.
  • It has mineral element Iron remove the body anemia.

Jackfruit can be eaten both raw and ripe. ‘Echor’ or raw jackfruit is eaten as a vegetable from spring to summer. Ripe fruit is quite nutritious. Jackfruit seeds also cooked as a vegetable curry. Burn like a nut Jackfruit seeds can be eaten. Jackfruit leaf is a delicious cattle food. Valuable furniture is made from the trees.


Kumror bora Bengali Recipe or Sweet Gourd Reicpe

$
0
0

Paka Kumror Bora Bengali recipe | Sweet Gourd Recipe:

kumror-bora-or-sweet-gourdtotanas-recipe


Pumpkin Recipe: How to make Kumro Bora Bengali recipe? Pumpkin with smashed Potato Bengali Recipe. Kumro bora recipe is very easy and simple Bengali recipe. Today I will show you how to make Pumpkin/ Kumro recipe with smashed Aloo/ Potato. It is very tasty and little sweet. You can say it "Paka Kumro Bora".

It is very famous in Bengal. You can serve it as evening snacks. There are different kinds of Pumpkin recipes in Bengal like curry, dalna, chokka etc. One more very popular recipes in Bengal that is called “Kumro Fuler Bora”. It is also very easy recipe made with Besan. Today I will show you step by step, how to make komro bora recipe?

Watch My Recipes:


Something about Sweet Gourd:
Sweet pumpkins can be eaten in many ways, we all know more or less. In Germany is not only feed, the Germans used the sweet pumpkins to decorate the house especially in autumn. Different kind of sweet pumpkins of different countries can be found in Germany. Sweet pumpkin soup is a favorite of Germans. The Germans mostly made sweet foods with sweet pumpkin. 

kumror-bora-or-sweet-gourd-Bengali-recipe


Pumpkin seeds Health and Beauty Benefits:

Pumpkin seeds have ever eaten? Many people may think it is thing to leave. Pumpkin seeds are sweet and nutritious food.

  • Eat Pumpkin seeds regularly it can be melt kidney stones slowly. Pumpkin seeds also prevent kidney stones.
  • Pumpkin seeds are a nutritious food, because it has plenty of mineral and fiber. Two elements are very useful for the body of minerals and fiber.
  • Pumpkin seeds have selenium and zinc. These two elements help to heal skin acne. So who are suffering from acne problems, and they eat pumpkin seeds.
  • There are vitamin A, vitamin E and omega-3 in pumpkin seeds. This material keeps the skin and hair strong and healthy as well.
  • Eating pumpkin seeds on a regular basis is good for skin health.There is no comparison with pumpkin seeds to increase the brightness of the skin.


Pumpkin increases the power of digestion.

  • Pumpkin is one of the most popular vegetables with Vitamin 'A'. Starting from fried recipes, pickles, vegetarian, meat can be cooked with all pumpkins.
  • Vitamin A component of the pumpkin is very good for the eyes. Especially those who are in low or dim light, pumpkin’s vitamin A protects the cornea their eyes.
  • Pumpkin is the store of different types of vitamins. It contains plenty of antioxidants, vitamin A, C, E, iron, magnesium and many other components.


Mochar Chop/ Banana Flower Cutlet Bengali Recipe

$
0
0

How to make Mochar chop/ Banana Flower Cutlet Bengali Recipe?


mochar-chop-banana-flower-cutlet-bengali-recipe

Mochar chop/ Banana Flower Cutlet is one of the best Bengali recipe. Mochar chop is a type of snack recipe. Banana Flower Cutlet or Mochar chop is popular as evening snack with tea or muri. You can say it veg cutlet recipe.

Watch The Recipe In Bengali


Ingerdients for Mochar chop/ Banana Flower Cutlet:

  • Mince Banana Flower Boiled With Turmeric 1 bowl
  • Boiled Potato 1 nos
  • Besan/ Gram Flour
  • Salt to taste
  • Chopped Onion
  • smashed garlic & ginger 1 tsp
  • peanut
  • Besan/Flour Batter
  • Fried red chili with Cumin
  • Garam Masala 1/2 tsp
  • Turmeric Powder 1/2 tsp
  • Cumin Powder 1/2 tsp
mochar-chop-banana-flower-cutlet-bengali-recipe


Method for Banana Flower Cutlet/ Mochar chop:

  • Mince Banana Flower and boiled With Turmeric powder . Take 1 bowl Banana Flower.

mochar-chop-banana-flower-cutlet-bengali-recipe
  • Crushed the  fried red chili and cumin well.
mochar-chop-banana-flower-cutlet-bengali-recipe

  • Now take boiled potato in a bowl and smashed it well.
mochar-chop-banana-flower-cutlet-bengali-recipe

  • Heat a Pan and add oil 2 tsp

mochar-chop-banana-flower-cutlet-bengali-recipe

  • Add Chopped Onion in the hot oil make it little brown.

mochar-chop-banana-flower-cutlet-bengali-recipe

  • After that add smashed garlic & ginger paste, stir it well.
  • Now add Turmeric Powder, Cumin Powder, peanut (be sure remove the skin of peanut) and Crushed fried red chili and cumin.

mochar-chop-banana-flower-cutlet-bengali-recipe

  • At the last add Mince boiled Banana Flower.
  • Now add Boiled Potato and mix everything well.
  • Saute till the raw smell disappears. 

mochar-chop-banana-flower-cutlet-bengali-recipe

  • Add salt as per your taste and Graram Masala.
  • Fry them till they turn golden brown. Simmer it for 5 minutes.
  • Banana Flower mixture is ready.

mochar-chop-banana-flower-cutlet-bengali-recipe

  • Now take it out in a serving bowl.
  • Take Besan in hand and take Banana Flower mixture, make flat round shape cutlet or chop style.

mochar-chop-banana-flower-cutlet-bengali-recipe

  • Make all the cutlets same and add some Besan/ flour on the cutlet/ chop.

mochar-chop-banana-flower-cutlet-bengali-recipe

  • Make a batter with flour/ Besan and water.
  • Now dip the cutlet/ chop in better and add in to the hot oil one by one.

mochar-chop-banana-flower-cutlet-bengali-recipe

  • Deep fry both side and Fry until get a brownish color.

mochar-chop-banana-flower-cutlet-bengali-recipe

  • Serve hot with chilly or tomato sauce.

mochar-chop-banana-flower-cutlet-bengali-recipe


Let's see what are the benefits of Banana Flower?
The banana trees are found in all regions of our country. Banana is beneficial for health as well as Banana flower. It has plenty of iron and banana flowers are available to buy at a reasonable price in the market. Let us know what we can get benefit from edible banana flower. It can not be compared to strengthen Hemoglobin is the main component of blood.


  • Banana flowers are very beneficial to maintain blood volume.
  • There are plenty of irons with calcium, magnesium, iodine in Banana Flower.
  • It has Vitamin A which fights against the disease Night blindness.
  • After a complex bone operation to improve the blood and it helps strengthens bones quickly.
  • It is very beneficial for diabetic patients.
  • However, eating too much Banana Flower causes constipation.


Paneer Butter Masala Recipe Restaurant Style at Home

$
0
0

Best Paneer Butter Masala Recipe Restaurant Style at home:


paneer-butter-masala-recipe-restaurant-style


That will not always true chicken-Mutton is delicious. There are much more delicious vegetarian recipes. Most of the vegetarian like cheese. To think about them today we've got a cheese recipe. A very popular cheese recipe is the cheese butter masala. 

Paneer Butter Masala Recipe  restaurant style in Bengali at home.  Paneer Makhani or Paneer Butter Masala Recipe is a popular Bengali recipe. I will show you how to make Paneer Butter Masala Recipe step by step?  It is one of the best recipes for the vegetarian. Paneer Butter Masala Recipe is very easy and quick recipe. It is famous for its taste. You can prepare this recipe within a few minutes.
Paneer Butter Masala or Paneer Makhani Recipe is famous for its rich and thick gravy and it is a North Indian dish but it is also famous in Bengal. 

Ingredients for Paneer Butter Masala Recipe:

    1. Paneer 200 grams
    2. Butter 2 tbs
    3. Sliced Green Chili 4-5 nos
    4. Red Chili 2 nos
    5. Bay Leaf 2 nos
    6. Cinnamon 3 nos
    7. Cardamom 5 nos
    8. Cloves 5 nos
    9. Sugar 1 tsp
    10. Salt to taste
    11. Dahi/Yogurt 2 tbs
    12. Tomato paste 1 cup
    13. Onion Paste 1 cup
    14. Oil 1 tbs
    15. Pinch of Turmeric Powder
    16. Coriander Leaves
    17. Fried crushed Fenugreek Leaves 1 tsp for Smell & taste
    18. Fresh Cream 2 tsp
    19. Cashew nut paste 1 tsp
    20. Garlic & Ginger Paste 1 tsp
    21. Roasted Coriander powder 1 tsp
    22. Roasted Cumin powder 1 tsp
    23. Red Chili Powder 1 tsp
    24. Green Chili Paste 1 tsp

      How To make Paneer Butter Masala Recipe? watch the video


      Watch more popular recipes:


      How to ready Ingredients for Paneer Butter Masala Recipe?

      1. Be sure, you take ripe and red fresh tomatoes for the gravy; it will bring the beautiful reddish color tone for the curry. Take 2 big size fresh red tomatoes for the gravy and make a thick paste with grinder.
      2. Take 200 grams Paneer for the recipe. Home made paneer is the best for this recipe, but you can use any kind of paneer available in the market. Cut the paneer in a cube style medium size.
      3. Use Dahi or Yogurt 2 tabs, add some water and mix it well.
      4. Take 2-3 nos medium size onion to prepare the onion paste. First cut the onions into pieces and add in the grinder for paste.
      5. Take butter, I used 2 tsp of butter. 2 tsp is enough for Paneer Butter Masala Recipe.  It is one of the most important ingredients for this recipe. It will make the curry so testy.
      6. Take fresh Green chili 4-5 nos, wash it in clean water and sliced it as your style with a sharp knife. You can make ring by slicing across the whole chili or make cube type or cut lengthways. This is your choice.
      7. Now I will prepare Garam Masala. For this I take Cinnamon 3 nos, Cardamom 5 nos, Cloves 5 nos for the test purpose and good smell. I also used 2 whole red chilies and 2 Bay Leaves for spices singed.
      8. Take Oil 1 tsp oil. I used white sunflower oil. But most of the Bengali people like mustard oil. The choice is yours.
      9. Take 1/2 tsp Turmeric powder and Red Chili Powder 1 tsp.
      10. Take Green fresh Coriander Leaves 1 bunch and mince it properly. I will use it in the curry and also for Garnish. Be sure before use Coriander Leaves wash it in cool and clean water.
      11. Take crushed Kasuri Methi (fenugreek leaves) 1 tsp for smell & taste. How to prepare it?  Heat a pan and add 1 tsp Kasuri Methi, stir it for 2-3 minutes in the pan. Remove from heat and take it in a bowl. Now crushed it in hand properly. Why I used roasted Kasuri Methi? It will bring the most delicious smell for the recipe.
      12. Take Fresh Cream 2 tsp. Use Fresh Cream for the taste, you can use cheese also.
      13. Take Cashew nut paste 1 tsp. Take 4-5 nos Cashew nut and add some water. Then make a paste.
      14. Garlic & Ginger Paste 1 tsp. Take about 2 inch Ginger and 4-5 medium size Garlic, make 1 tsp Ginger-Garlic paste.
      15. I used Roasted Coriander powder 1 tsp, Roasted Cumin powder 1 tsp. I make it at home, but you can buy ready made also for use.
      16. At the last take 3-4 nos Green Chilies and make 1 tsp paste.
        paneer-butter-masala-recipe-restaurant-style


      Method for Paneer Butter Masala Recipe:

      1. First heat the Pan and add oil and Butter, stir nicely it for sometime till melt.
      2. Now Seasoning, add Cinnamon, Cardamom, Cloves, Red Chili,Bay Leaf. Stir nicely all the ingredients for few minutes.
      3. Now add Onion Paste, fry it well.
      4. Now add Garlic & Ginger Paste, Green Chili Paste, Red Chili Powder, Turmeric Powder. Add sugar for color and taste and mix it well. Fry until get a brownish color.
      5. Now Add tomato paste and Cashew nut paste. Take time and make the Gravy well. After that add salt and Yogurt, Roasted Cumin powder, Roasted Coriander powder. Stir it well and add Green Chili, Fresh Cream, mix it and add 1 cup water, now add paneer and add Kasuri Methi.
      6. Cover and cook for about 5 minutes low flame. It will tender the paneer.
      7. At the last add Coriander Leaves. Paneer butter masala is ready.
      8. Garnish with little fresh cream and  coriander leaves and serve.

      paneer-butter-masala-recipe-restaurant-style


      Doi Begun or Brinjal Curd or Eggplant Yogurt Bengali Recipe

      $
      0
      0

      Doi Begun/ Brinjal Curd/ Eggplant Bengali Yogurt Recipe:


      doi-begun-brinjal-curd-eggplant-yogurt-bengali-recipe


      Doi Begun/ Brinjal Curd/ Eggplant yogurt Bengali recipe, it is very simple and popular Bengali Recipe. Doi Begun/ Brinjal Curd/ Eggplant yogurt recipe is one of the famous recipes in south India.

      Ingredients for Doi Begun:

      1. Onion Paste
      2. One bowl yogurt
      3. Oil ½ cup
      4. Ginger garlic paste tsp
      5. Cloves 3-4 nos
      6. Cardamom 3-4 nos
      7. Cinnamon 2-3 nos
      8. Nigella seed as per taste
      9. Chili powder 1 tsp
      10. Salt as per taste
      11. Turmeric powder 1 tsp
      12. Cumin powder 1 tsp
      13. Coriander powder 1 tsp
      14. Graram Masala 1 tsp
      15. Brinjal 6-8 nos
      doi-begun-brinjal-curd-eggplant-yogurt-bengali-recipe

      How to make Doi Begun/ Brinjal Curd/ Eggplant Yogurt Bengali Recipe?


      Watch This Video


      Method For Doi Begun/ Brinjal Curd Recipe:

          First wash the Eggplants in cool fresh water. Now I will cut the Eggplants/Begun. I will make this recipe keeping the stalk of Eggplants with curd. Now take a knife and remove the flower part from the Eggplant one by one keeping the stalk intact and cut one side horizontally from the middle of the Eggplants/ Brinjal. Be sure don’t separate it or cut the Eggplants/Begun in to two parts. Now cut all the Eggplants/Begun in the same process, one side lengthwise up to the middle.  


          doi-begun-brinjal-curd-eggplant-yogurt-bengali-recipe 

          Now in a plate or bowl, take Garam masala powder, Coriander powder, Cumin powder, Turmeric powder, chili powder and salt, mix it well all together.

          doi-begun-brinjal-curd-eggplant-yogurt-bengali-recipe 

          Now take one Eggplant/Begun and add some mixed spice in it. Coated or greasing itproperly. Do this for all the Eggplant/Begun and rest of the mixed spice I will use for the gravy of Doi Begu/ Eggplant Yogurt recipe. 

          doi-begun-brinjal-curd-eggplant-yogurt-bengali-recipe 

          Heat the pan with oil and add Eggplant one by one for fry. It will take few minutes to fry. You can cover it otherwise it will take time more. Fry all the Eggplants until it become soft and turn brownish yellow.

           doi-begun-brinjal-curd-eggplant-yogurt-bengali-recipe

          Remove all the Eggplant from the heat in serving bowl.
          I will add Cloves, Cardamom and Cinnamon in rest of the fried oil. Stir it 2-3 times. Now add Nigella seed as per your taste. 

          doi-begun-brinjal-curd-eggplant-yogurt-bengali-recipe 

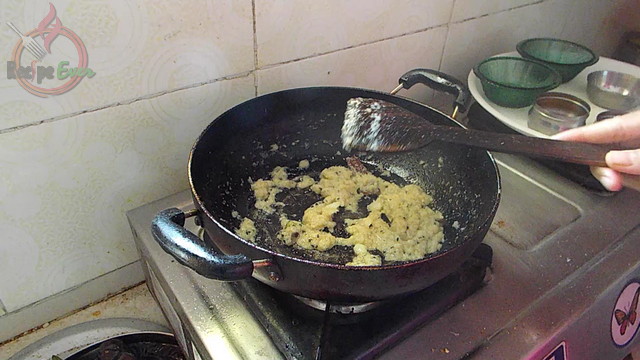
          Now add onion paste, stir it for few minutes. Saute it till the raw smell disappears. 

          doi-begun-brinjal-curd-eggplant-yogurt-bengali-recipe 

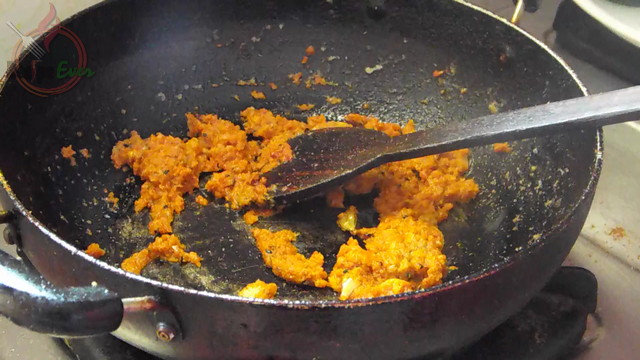
          Add Turmeric powder, Chili powder and Ginger garlic paste. Mix it properly and fry them well. Fry until get a brownish color.

          doi-begun-brinjal-curd-eggplant-yogurt-bengali-recipe 

          Add some mixed spice before we prepared for the Eggplant/Begun. Now we will use for the gravy. 
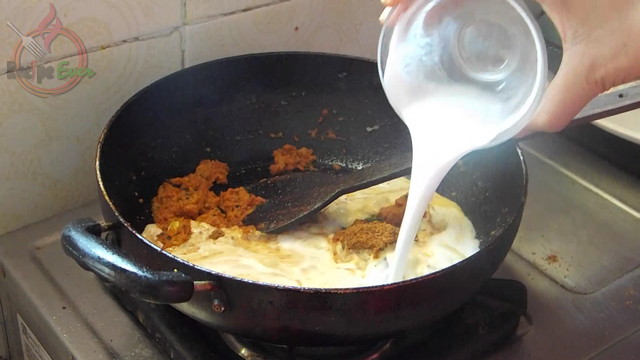
          Add yogurt and mix it well. Now add salt as per your taste. Keep it for few minutes for fry. Be sure, cook for about 3 minutes in low flame.

          doi-begun-brinjal-curd-eggplant-yogurt-bengali-recipe 

          Add some water for more gravy. 
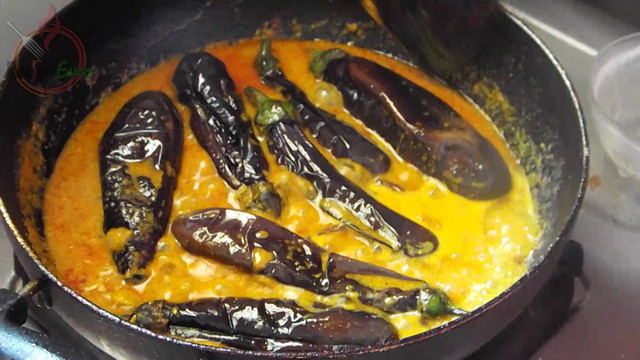
          Add all the fried brinjal/ Eggplants one by one in the gravy. Stir it gently for mixing the gravy with brinjal. Now cover & cook for about 5 minutes in low flame.


          doi-begun-brinjal-curd-eggplant-yogurt-bengali-recipe

          Doi Begun curry/ Brinjal Curd/ Eggplant Yogurt Bengali recipe is ready. 

            doi-begun-brinjal-curd-eggplant-yogurt-bengali-recipe


            The benefits of eating Yogurt:


            Curd is a type of milk food which is prepared from milk fermentation bacteria. It has a reputation as a nutritious and delicious food. It is known all over the world. Yogurt contains very plenty of protein, calcium vitamin B6 and vitamin B12.

            Doctor or nutritionist is always advised to eat yogurt. In other countries, such as India, after the meal always eat yogurt. Yogurt is a lactic fermented food. Yogurt is a highly nutritious and healthy food. It has useful vitamins, minerals etc. Even it is regarded as more nutritious than milk.

            1. No carbohydrate, sugar and no trans fat.
            2. It helps to prevent and cure.
            3. It increases the body's resistance to disease. It works better to prevent like cold, cough and fever.
            4. The beneficial bacteria of yogurt, kills the harmful bacteria.
            5. It is beneficial for constipation, diarrhea and colon cancer patients, because it has the lactic acid.
            6. Yogurt bacteria help for digestion.
            7. It has plenty of calcium and vitamin D, which helps to strengthen teeth and to the formation of bones.
            8. This is much less than the time to digest milk. Who has digestive problems in milk; they can eat it instead of milk.
            9. Yogurt can refine the blood. Patients with high blood pressure can eat yogurt regularly to keep blood pressure under control.
            10. Diabetes, heart disease patients can eat yogurt regularly to keep the disease under control.
            11. Eating yogurt on a regular basis, it supplies the body with nutrients from other foods.
            12. Yogurt can control body temperature. So it is good to eat yogurt in summer.


            Tilapia Recipe: Tilapia fish Curry recipe with gravy

            $
            0
            0

            How to cook Tilapia Fish Curry Recipe in Bengali style?

            tilapia-recipes-tilapia-fish-curry-recipe-bengali-style

            Tilapia is a sweet water fish. This is a very tasty and healthy fish. Tilapia consumed worldwide and referred to in the same name "tilapia". This fish curry regularly produced in Bengali households, as well as on special occasions, it is very favorite to Bengali's. We can not say that is a recipe for Bengal, as it is not authentic. Typically, tilapia is a very popular fish in the world.

            Our main food is rice and fish. As a Bengali we love fish and rice. Fish is very tasty food. Protein, oil, vitamins and mineral salts is an important source of fish. Looking for something a little different for dinner on a rainy night? Then instant make a very different fish meal at home. Try this fish recipe absolutely without hassle with extraordinary taste. There are plenty of vitamins and mineral salts in fish. We eat fish, but many of us do not eat fish oil. But there are many benefits of fish oil. Fish oil can remove old walking disabilities. 

            Tilapia Fish Curry Recipe is very famous in Bengal. Tilapia fish curry recipe is very easy to prepare, I used yogurt for make the gravy tasty. Tilapia Recipe is one of my favorite fish curry recipe. I will show you how to cook Tilapia Fish Curry Recipe step by step? If you are looking for a Tilapia Recipe, then it is one of the best fish recipes. In Bengali you can say it “Tilapia macher Tel Jhal”. This recipe is very simple and quick also; with in 20 minutes you can prepare it. For this Fish Curry recipe I made with thick gravy which is very testy. You can try this recipe once.

            Tilapia fish recipe is very easy to prepare, I used yogurt for make the gravy tasty. This is very spicy type of Tilapia Fish Curry. This curry is made regularly at Bengali household as well as in a special occasion. “Tilapia macher Tel Jhal” is a Bengali dry fish preparation but we can not claim this is to be a Bengali recipe. Tilapia is very famous all over the world. There are so many ways to cook Tilapia fish. I make this recipe as Indian style. I used lot of Indian spices like Garlic & Ginger paste, Poppy seed paste, Green Chili, Onion paste, Tomato paste, Mustard seed paste, Turmeric powder, Chili powder, Mustard oil, Black cumin & whole Cumin etc.

             
            Watch this video for this preparation:


            Watch more Popular Recipes:

            Ingredients for Tilapia Recipe:

            1. Tilapia fish 250 grams
            2. Green Chili 3-4 nos
            3. Salt as per taste
            4. Garlic & Ginger paste ½ tsp
            5. Poppy seed paste 2 tsp
            6. Onion paste ½ cup
            7. Tomato paste ½ cup
            8. Mustard seed paste ½ tsp
            9. Turmeric powder ½ tsp
            10. Chili powder 1 tsp
            11. Mustard oil ½ cup
            12. Black cumin & whole Cumin 1 tsp

            tilapia-recipes-tilapia-fish-curry-recipe-bengali-style

            How to cook Tilapia Fish?

            1. I have taken Tilapia Fish 250 grams. After clean & wash fry the Tilapia with turmeric powder and salt in mustard oil, make it brown.
            2. Heat the pan and add 2 spoons of mustard oil.
            3. Now add Black cumin & whole Cumin seeds, stir it gently.
            4. When you will get the nice smell add onion paste. Fry until onion get a brownish color, otherwise raw smell will come.
            5. Now add Garlic & Ginger paste, Poppy seed paste, Turmeric powder, chili powder, Mustard seed paste and add some water. Mix all the spices well. Stir it for few minutes make it little brown.
            6. Now add tomato paste and salt as per your taste. Again mix it properly. Stir it for 1 minute.
            7. Add one cup water for the gravy. After few minutes add the Tilapia Fish one by one in the gravy.
            8. Add sliced green chili and 1 tsp mustard oil.
            9. Cover it and keep it for 1 minute in a low flame.
            10. Open the cover and toss the fish other side.
            11. Again cover it for another 1 minute.
            12. Now it is ready Tilapia fish curry recipe.

            tilapia-recipes-tilapia-fish-curry-recipe-bengali-style

            This preparation goes well with hot any type of rice.

            How to Cook Restaurant style Mushroom Butter Masala Curry Recipe?

            $
            0
            0

            Bengali Recipes: Mushroom Butter Masala Curry

            Restaurant style Mushroom Butter Masala. How to make Mushroom Butter Masala recipe? Mushroom Butter Masala recipe step by step. This one is easy to prepare and you like it, if you like mushrooms. Mushrooms have always been an all time favorite of my cooking ingredient of all time. This is tasty veg dish with thick gravy.

            how-to-cook-mushroom-butter-masala


            Ingredients:
            Sliced Onion 2 big size
            Capsicum 1 nos big size, sliced like cube
            Tomato 2 nos medium size
            Bay leaf 1 nos
            Cashew nut 10 nos
            Sliced Garlic 4 nos
            Green Chili 2 nos
            Black Pepper powder 1 tsp
            Garam Masala ½ tsp
            Cumin Seed 1 tsp, Fenugreek leaf, cardamom 2 nos, Cloves 4 nos, Cinnamon 1 nos
            Mushroom 250 grams
            Sliced Coriander leaves 4 tsp
            White oil 2 tsp
            Ginger paste 1 tsp
            Tomato sauce 2 tsp
            Butter ½ tsp
            Turmeric powder 1 tsp
            Chili powder ½ tsp
            Salt as per taste

            Watch This Video:


            How to make Mushroom Butter Masala recipe?

            * First I will cut the mushroom, this is medium size mushroom. Cut in to 6 small pieces.
            Clean the mushroom in clean water, and then remove the thin skin from the mushroom.
            * Cut all the mushrooms like that.
            * Heat the pan and add oil 2 tsp.
            * Now add cardamom, Cloves, Cinnamon and Bay leaf. Stir it little.
            * Add cumin seeds and sliced Garlic and Onion. Now stir it and light fry all the things.
            * Add Ginger paste, mix it well.
            * Add sliced capsicum, tomato, Turmeric Powder, Chili powder and salt as per taste. Stir all the things well.
            * Now cover it for 4 minutes.
            * Now add all the sliced mushroom
            * Add Garam Masala, Black Pepper powder, Tomato sauce, Stir it.
            * Add sliced Green Chili, Cashew nut and mix it well.
            * Now cover it for 10 minutes in a low flame.
            * After 10 minutes open and stir it once.
            * Cover it again for 10 minutes
            * Now add Sliced Coriander leaves, I am not using Coriander powder, if you want you can use.
            * Add butter and Fenugreek leaf. Stir it for 1 minute.


            * Mushroom butter masala is ready to serve.

            How to make Bengali Fish kalia Recipe? Rui Macher Kalia

            $
            0
            0

            Bengali Fish kalia Recipe: Rui Macher Kalia


            how-to-make-bengali-fish-kalia-recipe


            Rui Macher kalia is a traditional Bengali spicy fish stew. It is as a very spicy stew served with rice.


            Watch This Video


            Ingredients:
            Ruhi fish 4 pieces, mixed with Turmeric powder & Salt
            Roasted Coriander Powder ½ tsp
            Roasted Cumin Powder ½ tsp
            Turmeric Powder ½ tsp
            Chili Powder 1 tsp
            Raisin almost 20 nos
            Onion Paste 1 Cup
            Tomato paste 1 big size tomato
            Cashew nut paste 2 tsp
            Mustard Oil ½ cup
            Ripped Green Chili 3 nos
            Cinnamon, Cloves and Cardamom
            Bay leaf and Red Chili
            Sugar ½ tsp
            Salt to taste
            Chopped coriander leaves
            Whole Cumin seeds ½ tsp
            Ginger Garlic Paste 1 tsp
            Yogurt ½ cup
            Water 1 cup

            How to make Bengali Fish kalia Recipe? Rui Macher Kalia

            * First I will fry the fish, so heat the pan and add oil in the pan.
            * I added more oil for the fish fry well.
            * Add the fish one by one when the oil is heat.
            * Fry the fishes until get a brownish color.
            * After frying the fishes, take it out in a serving bowl.
            * Keep 2 tsp oil in the pan and remove extra oil.
            * Now add Cinnamon, Cloves and Cardamom, Bay leaf and Red Chili.
            * Stir it 2-3 times and add Whole Cumin seeds
            * When you will get the nice smell from the fried spices add Onion paste.
            * Stir it for few minutes.
            * Now add Ginger Garlic Paste.
            * Mix and stir it well otherwise raw smell will come.
            * Add ½ tsp sugar. It is for taste and color of the gravy. You can add less than ½ tsp sugar or if you do not like it then no need to add the sugar.
            * Add Turmeric Powder, Chili Powder 1 tsp. you can add more or less Chili Powder. Mix it properly.
            * Now add tomato paste. Again stir it well.
            * Add Roasted Coriander and Cumin Powder 1 tsp.
            * Add Ripped Green Chili and salt as per taste.
            * Add Cashew nut paste and Yogurt ½ cup
            * Mix it well.
            * Now add Raisin and add 1 bowl of water for the gravy. If you want more gravy then add more water.
            * After few minutes, add the all fishes in the gravy one by one.
            * Now dip the fishes in the gravy nicely.
            * Keep it for 5 minutes in a low flame. Flip other side of the fishes.
            * After 5 minutes add Chopped coriander leaves.
            * Now Ruhi Fish Kaliya is ready.


            Watch my favorite recipes:


            Begun Bahar Bengali Recipe, Spicy Eggplant/ Brinjal masala Recipe

            $
            0
            0

            Begun Bahar: Spicy Brinjal Fry Recipe

            Begun Bahar/ Spicy Eggplant recipe is very easy and quick recipe with in 20 minutes you can prepare it. It is famous for it taste. There are different types of Begun/ Brinjal recipes in Bengal. I used mustard Oil for this recipe. I also used Tomato, Capsicum, Green chili, Onion and some Indian spices.

            begun-bahar-bengali-recipe

            Ingredients For Begun Bahar:

            Eggplant/ Begun 1 medium size
            Sliced Tomato ½
            Sliced Capsicum ½
            Sliced Green Chili 2 nos
            Sliced Garlic
            Red Chili 2 nos
            Pinch of Nigella seeds
            Mustard oil 2 tbsp
            Cumin and Coriander Powder ½ tsp
            Chili powder ½ tsp
            Turmeric Powder ½ tsp
            Chopped onion 1 big size
            Salt as per taste

            Watch This Video: Begun Bahar


            Method For Begun Bahar:

            * Cut the Begun/ Eggplant in to 6 pieces.
            * Add salt, pinch of Turmeric & Chili powder. Mix everything well.
            * Heat the Pan and Add oil, I used Mustard Oil.
            * Add Chili and Nigella seeds. Stir it 3-4 times.
            * Add Sliced Garlic and stir it 2-3 times and add all the sliced Begun/ Eggplant. Stir it.
            * I will make the Begun Bahar in a low flame.
            * Cover it for 2 minutes.
            * Add Sliced Onion. Fry the Brinjal and onion well.
            * Again cover it for 2 minutes.
            * Add sliced Tomato, Capsicum, Turmeric Powder, Chili Powder, Cumin and Coriander Powder and salt to taste.
            * Stir it well and cover it again for 2 minutes.
            * It will cook in a low flame, so you have to cover and open again and again.
            * Add sliced Green Chili and pinch of Mustard oil.
            * Stir it nicely for few minutes.
            * Now Begun Bahar is ready.

            Watch my favorite recipes:


            How to make Chanar Dalna? Bengali Recipe

            $
            0
            0

             How to make Chanar Dalna? Bengali Recipe

            How to make Bengali Recipe Chanar Dalna? Chanar Dalna is very famous Bengali recipe. Chanar Dalna Vegetarian Recipe. Serve this recipe with hot plain rice.


            how-to-make-chanar-dalna-bengali-recipe

            Ingredients For Chanar Dalna:

            Potato 1 big size, cut it like cube shape
            Chopped Onion 1 big size
            Chopped Tomato 2 medium size
            Chopped Green Chilies 2 nos
            Chana (1 liter milk)
            Oil 3 tsp
            Red Chili Powder ½ tsp
            Turmeric Powder ½ tsp
            Ghee ½ tsp
            Roasted Coriander Powder ½ tsp
            Garam Masala ½ tsp
            Sugar ½ tsp
            Salt to taste
            Ginger Paste 1 tsp
            Bay leaf, Cumin Seeds ½ tsp, Cinnamon 2 nos
            Chopped Coriander leaves   

            Method for Chanar Dalna:


            First smashed the chana nicely, make it like a big ball.
            Cut the Chana in to small pieces, make it small oval shape.
            No need to make it big, it will be bigger when you add in the gravy.
            Heat the pan and add oil.
            Fry the potatoes
            Make it little brown. Take it out in serving bowl.
            Now little fry the chana.
            Take it out in a serving bowl.
            Add Cinnamon, Bay leaf. Stir it little.
            Add cumin seeds
            Add Chopped Onion. Fry it well.
            Add Ginger Paste, Turmeric Powder and Chili Powder (you can use less or more).
            Add salt to taste.
            Add sugar, it is for the taste and color of the curry.
            Stir it little; otherwise raw smell will come from Garlic paste. Mix it well.
            Add Chopped Tomato. Fry it little.
            Add fried potatoes. Mix it with masala and cover it for 3-4 minutes.
            After 3 minutes open the cover and stir it.
            Add more than one cup water.
            Now add all the fried Chana Pieces. Cover it for 5 minutes with low flame.
            Add Chopped Green Chilies and again cover it for 5 minutes with low flame.
            Add Garam Masala, Roasted Coriander Powder, Chopped Coriander leaves and Ghee
            Mix it well. Keep it for few minutes.
            Chanar Dalna is ready now.


            Watch my favorite recipes:

            Aloo Posto Bengali Recipe: Potato with Poppy seeds paste

            $
            0
            0

             How to cook Aloo Posto recipe in Bengali style?

            how-to-cook-aloo-posto-bengali-recipe

            Aloo Posto Bengali Recipe is very quick and famous recipe in Bengal. Aloo Posto or  Potato with Poppy seed is Bengali traditional recipe which goes with hot plain rice. Aloo Posto Recipe: Learn How to cook Aloo Posto recipe in Bengali style? Aloo Posto recipe is very common recipe in Bengal. It is classic delicious vegetarian Bengali dish.


            Ingredients for Aloo Posto Recipe:

            2 Potatoes medium size, sliced in to medium cube size
            1 big size sliced Onion
            4 Green Chilies (slit 2 chilies)
            1 Tomato cut into 4 pieces
            Poppy seed paste 2 tsp
            Mustard Oil 4 tsp
            Salt as per taste
            Whole Chili 1, Bay Leaf 1, Pinch of Black Cumin
            Turmeric Powder ½ tsp

            How to cook Aloo Posto recipe?

            * Heat the pan and add oil
            * Add Bay leaf, Red Chili and Black Cumin. Stir it little
            * Add potatoes. Fry the potatoes, be sure make it half fry.
            * Add sliced Onion and slit green chilies. I used 2 Green Chilies, you can add more if you want.
            * Fry everything well
            * Now add Turmeric Powder and Poppy Seed paste.
            * Add little water. Mix it and stir it little.
            * Add Tomato. Don’t fry the poppy seed paste too much. Make it slight fry.
            * Now add 2 cups water.
            * Add salt to taste. Now cover it for 15 minutes.
            * After 15 minutes add Pinch Mustard Oil and Green Chili. I used Green Chili because it will look nice when it is served.
            * Keep it for 2 minute after adding the Mustard oil.
            Now Alu Posto is ready.


            Watch my favorite recipes:
             

            How to make Chilli Mushroom restaurant style?

            $
            0
            0

            Make delicious Chilli Mushroom Recipe easily at home

            how-to-make-chilli-mushroom-restaurant-style


            Ingredients for Chilli Mushroom Recipe:
            200 grams Mushrooms, half boiled with salt. No need to cut the small mushroom. Cut the big size Mushroom into 2 pieces.
            Red Chili Powder one fourth of 1 tsp
            Pinch of Black Pepper
            Salt to taste
            Sunflower Oil
            Chopped Onion 1 big size
            Chopped Ginger and Garlic ½ tsp
            Chopped Capsicum one fourth
            Chopped Tomato 1
            Chopped Green Chili 1
            Chopped Coriander leaves 1 tbsp
            Ginger and Garlic paste ¼ tsp
            Corn flour 2 tbsp
            Flour 2 tbsp
            Tomato ketchup 3 tbsp
            Green chili sauce 1 tbsp
            Soya Sauce 2 tbsp
            Red Chilli Sauce 1 tbsp

            How to Prepare Chilli Mushroom Recipe?


            First I will ready the batter. Take a bowl and add flour and corn flour. I will not add all the corn flour. Keep some corn flour for the gravy.
            Add salt to taste.
            Add chilli powder.
            Add ginger and garlic paste.
            Mix everything well.
            Add some water to mix it properly. Be sure it is not too thick or thin.
            Add boiled mushroom in the batter and mix it well.
            Marinate it for 5 minutes.
            Heat the pan and add oil.
            Now add the marinated mushroom one by one in the hot oil.
            Stir it nicely; otherwise it will stuck with each other.
            No need to fry too much. Make it little brownish.
            Mushroom fry is ready. Take it out in a bowl.
            Now heat a karai and add 3 tsp oil.
            Add chopped Ginger and Garlic. Stir it for little fry.
            Now add chopped capsicum.
            Add chopped Onion. Stir it for 2-3 times.
            Add chopped Tomato.
            Add chopped green chilli.
            Add salt to taste. Stir everything well. But don’t fry too much. Be sure make it in a low flame. Because I want the color of vegetables, then it will look good.
            Add Tomato ketchup, Green chili sauce, Red Chilli Sauce and Soya Sauce.
            Mix every thing well.
            Add Chopped Coriander leaves and fried mushroom.
            Mix it well.
            Now take water in a bowl and add corn flour. Mix it properly.
            Add the corn flour water in the karai for gravy purpose. It will thick the gravy.
            Keep it for 5 minutes.
            After 5 minutes add Black Pepper Powder.
            Mix it with mushroom.
            Chilli mushroom is ready.


            Watch my favorite recipes:


            Ghugni Chaat Bengali Recipe/ Kolkata Style Ghugni/ Peas Curry

            $
            0
            0

            Ghugni Recipe Bengali Style: How to make Green Peas Curry at home?

            ghugni-chaat-kolkata-style-ghugni-recipe


            Learn Ghugni recipe in Bengali Style. How to make Ghugni/ Green Peas Curry recipe at home, Kolkata Style? Ghugni is very famous street food in kolkata. It is very popular as a evening snack in Bengal. Ghugni is made with dried green or yellow peas, spiced up with Indian masala. Here is the recipe step by step you can follow it. Ghugni is very simple and easy recipe. One of the famous street food in kolkata.

            Ingredients For Ghugni Chaat Recipe:

            ghugni-chaat-kolkata-style-ghugni-recipe

            1 potato cut into small like cube size
            100 grams dried yellow/ green peas (soaked for 6 hours)
            Chopped Onion 1 big size
            Chopped Tomato 1
            Chopped Coconut ¼ cup
            Chopped Green chili 1
            Chopped coriander leaves
            Garam Masala paste (3 Cardamom, 3 Cloves, 1 Cinnamon)
            Ginger and Garlic Paste 1 tsp
            Bay leaf 1,
            Pinch of Cumin seeds
            Salt to taste
            Turmeric powder ½ tsp
            Chilli powder 1 tsp
            Oil 3 tsp

            How to make Ghugni Recipe Bengali Recipe?

            First you have to boil the peas and potatoes with water. You can use pressure cooker 3 whistle sounds.
            Heat the pan and add oil.
            Add bay leaf and cumin seeds. Stir it little.
            Add chopped coconut. Fry it little.
            Add chopped Onion. Be sure half Fry it.
            Now add Ginger and Garlic paste. Mix it properly
            Add chopped Tomato and Turmeric Powder. Stir it.
            Add Chilli Powder. I used 1 tsp but you can use less or more. Stir it little.
            Add boiled Potatoes and Peas with water. Add one cup water more.
            Add salt to taste. Mix everything nicely.
            Keep it for 5 minutes.
            After 5 minutes add Garam Masala paste and Chopped coriander leaves.
            After adding coriander leaves keep it for 1 minute.
            Ghugni is ready.
            Before serve add some chopped Green Chilli, Onion, Tomatoes and coriander leaves.


            Watch my favorite recipes:
             

            Poha Pulao Recipe: How to make Poha? Bengali Chirer Polao Recipe

            $
            0
            0

            How to make Poha? Bengali Chirer Polao Recipe

            chirer-poha-pulao-recipe-how-to-make-poha 

            Poha Pulao Recipe: Chirer Polao Bengali recipe: How to make Poha? Chirer polao is famous Bengali Recipe. Rice Flakes Pulao or Chirer Pulao recipe is a quick breakfast recipe. How to make Chirer Polao? Bengali chirer Pulao or Polao is a little sweet dish mixed with nuts and vegetables.  

            Make breakfast a lot of trouble. Breakfast is needed to create a lot more time that’s why housewives are irritated. Moreover, there is not enough time in the morning. So many people are looking for something quick and also think about health. So take a look at today’s delicious and healthy snack recipe with different taste.

            It is really a very interesting recipe. I think it's a good recipe with less time and at low cost. This recipe is much better for your health and it has only 156 calories. It is very tasty and can be prepared with in 15 minutes. It is a very popular breakfast in the southern states and Maharashtra with little spicy. But the Bengali's prepared this recipe little different. They make it little sweet. 


            Ingredients for Poha Pulao Recipe:

            1. Rice Flakes/ Chire 2 cups
            2. Chopped Beans, Potato and Carrot 1 cup. Boiled with salt and water
            3. Coriander leaves 1 tbsp
            4. Chopped Green chili 1
            5. Cumin seeds ½ tsp
            6. Red chili 1
            7. Cloves 2
            8. Cinnamon 1
            9. Cardamom 1
            10. Salt to taste
            11. Chopped onion 1 big size
            12. Ginger and Garlic paste ½ tsp
            13. Raisin 1 tbsp socked it for 10 minutes
            14. Cashew nut 10 grams
            15. Ground nut 2 tbsp, fired with salt and oil
            16. Tomato sauce 1 tbsp
            17. Garam Masala Powder ½ tsp
            18. Ghee ½ tsp
            19. Sugar 1 tsp
            20. Turmeric and Chili Powder ¼ tsp
            21. Red chili sauce 1 tsp
            22. Sunflower oil 2 tsp

             chirer-poha-pulao-recipe-how-to-make-poha

            How to prepare the ingredients for Poha recipe?

            • First take Raisin 1 tbsp and socked it for 10 minutes.
            • Meanwhile take some ground nuts and fry it in a pan with some oil. Make it little brown. If you want can add pinch of salt in it. Then it will be very tasty. Remove the peel and store it in a jar for later use.
            • Now chopped everything like Beans, Potato and Carrot. Half boiled it with some water.
            • Take a big onion and chopped it.
            • Take 1 green chili and Coriander leaves and chopped it.
            • Take ½ tsp Ginger and Garlic and crushed it for paste.

              How to make Poha?

            • First wash the Chire or Rice Flakes in the water. Keep it for two minutes. After 2 minutes squeeze the Rice Flakes nicely and remove from the water. Spread it in a plate for dry neat and clean.
            • Heat the pan and add Oil.
            • Add Chopped boiled Beans, Potato and Carrot. Fry it little. It is done.Take it out from the pan. 
            • Again add oil. 
            • Add Cloves, Cinnamon, and Cardamom in the oil. Stir it little.
            • Add whole cumin seeds. Fry it little.
            • Now add chopped Onion. Half fry it.
            • Add crushed Ginger Garlic Paste. Fry it with oil and onion.
            • Add cashew nut. Mix it with oil.
            • Add chopped Green Chili, Chili Powder and Turmeric Powder. Add Red chili sauce, Tomato sauce and coriander leaves. Mix everything well.
            • Now add soaked Rice Flakes in the pan. Mix it well.
            • Add sugar, Garam Masala Powder, salt to taste, raisin, ground nut and fried Beans, Potato and Carrot. Mix it nicely and keep it for few minutes.
            • At the last add Ghee, stir it little.
            • Chirer Polao is ready.


            chirer-poha-pulao-recipe-how-to-make-poha


            Watch my favorite recipes:


            Indian Tandoori chicken/ Tandoori chicken recipe without oven

            $
            0
            0

            Tandoori chicken Indian recipe: How to make tandoori chicken at home without oven?

            tandoori-chicken-indian-recipe-at-home-without-oven


            Make Tandoori Chicken at home:

            Any food of chicken is more delicious. But there is no word, if it is Tandoori Chicken. Nowadays, Tandoori Chicken can be seen in almost all the marriages instead of roasted chicken. But when we make in the house is not like about the shop. Today I will show you the best and easy method which sounds like restaurant. We often eat Tandoori Chicken in the restaurant, if we get the same taste at home then there is no word. We went to a restaurant to eat this chicken recipe and just the dish drain it out. If you want you can make it at home. When you order a Chicken recipe in a restaurant, tandoori chicken is best. This dish is great to eat with bread, paratha, nanaruti etc. You can make this chicken recipe without tandoori oven at home.
             

            What is Tandoori chicken?

            Learn how to make best Tandoori chicken recipe at home with step by step guide without oven. It is very easy and famous Indian recipe. However, non-vegetarian maybe limited of people who love to eat Tandoori chicken. But Tandoori chicken is the name for the cooking method. Tandoori chicken is cooked in the Tandoor oven, that’s why it is called Tandoori chicken. If the Tandoor oven is not at home make it micro-oven or gas oven. This is such a mouth watering recipe.


            Ingredients for Tandoori chicken Recipe:
            • Chicken 250 grams
            • Kashmiri chili powder 1 tbsp
            • Ginger garlic paste 1 tsp
            • Fenugreek leaves 1 tsp
            • Salt to taste
            • Garam Masala Powder ½ tsp
            • White Oil 3 tbsp
            • Lemon Juice ½ tsp
            • Cumin powder ½ tsp
            • Cashew paste ½ tsp
            • Egg 1 nos
            • Yogurt ½ cup
            • Turmeric Powder
            • Cumin Powder
            • Besan/ Gram flour 1 tsp
            • Garlic
            • Ginger
            • Onion 
            tandoori-chicken-indian-recipe-at-home-without-oven

            Today I will prepare Tandoori Chicken. I will prepare this recipe on gas oven without tandoor oven.

            Watch The recipe in Video

              Watch My more Favorite Recipes : 


            How to marinate the chicken? First Marinate method:

            • First I will marinate the chicken. For this recipe we have to marinate chicken 2 times. I have taken 250 grams skinless chicken leg piece. But be sure give some deep stroke with knife on the chicken.
            • Kashmiri chili powder 1 tsp. I am not using any food color.
            • Ginger Garlic Paste 1 tsp
            • Fenugreek leaves powder ½ tsp. Fry the fenugreek leaves in a pan with out oil and make it dust.
            • Salt to taste
            • Garam Masala Powder ½ tsp
            • White oil 3 tbsp
            • Lemon juice ½ tsp
            • Take a bowl and add Ginger garlic paste for marinate the chicken.
            • Add Kashmiri chili powder ½ tsp, salt to taste and pinch of Garam Masala Powder. Pinch of Fenugreek leaves powder, 1 tsp oil and lemon juice. Rest of the spices I will use for second time marinate.
            • Mix all the ingredients nicely with hand.
            • Now add the chicken in the mixture. Mix the chicken with the mixture properly and try to add more spices in the stoke area of the chicken.
            • Cover it now for 30 minutes.

            tandoori-chicken-indian-recipe-at-home-without-oven 

              Chicken marinateSecondmethod:

            • Cumin powder ½ tsp
            • Cashew paste ½ tsp
            • Egg 1 nos
            • Yogurt ½ cup: Water secrete yogurt. Take a white cloth and add yogurt in it. Tighten and hang it for 1 hour.
            • A little Turmeric Powder
            • A little Cumin Powder
            • Besan/ Gram flour 1 tsp
            • One part of the Garlic
            • A small piece of Ginger 
            • A small piece of Onion
            • Here I am using ½ of part of the garlic and mince it. Same thing do for the onion and Ginger.
            • Now I will the gram flour. Take a pan and heat it. Add oil 1 tsp.
            • Now add all the mince Garlic, Ginger and onion. Stir it little.
            • Now add gram flour, no need to deep fry. Just remove the raw smell of gram flour.
            • Gram flour fry is ready. Keep it a side for cool.
            • After 30 minute I will marinate the chicken for second time.
            • Remove the Garlic, Ginger and onion from the gram flour.
            • Now add Yogurt in the gram flour.
            • Add cashew nut paste, Turmeric Powder, coriander powder, fenugreek leaves, cumin seeds, red chili powder. Add ½ tsp chili powder if you want. Add Garam Masala powder, salt to taste (before already we used salt so you have to remember it), keep it a side.
            • Add one egg in a bowl, beat it nicely. Add ½ of the beaten egg. (I used the Gram flour and egg because it will help to stuck all the spices on the chicken). 
            • Add 1 tsp oil.
            • Now mix every thing well with hand. In this time you can check the salt taste.
            • All the ingredients mixed nicely. It will look like spicy gravy.
            • Now add this on the marinated chicken.
            • Try to add more spices in the stroke area.
            • Now the second marinate is finished. Now keep it for 30 minutes in the fridge. You have time keep it for 1-2 hours for better result.

            tandoori-chicken-indian-recipe-at-home-without-oven


            • After 30 minutes, add 1 tsp oil in the hot pan.
            • Add marinated chicken in it.
            • And add extra gravy on the chicken.
            • Cover it for 5-10 minutes in a medium flame.
            • After 10 minutes open the cover and flip the chicken for fry other side.
            • Again cover it for 5-10 minutes in a medium flame.
            • After 10 minutes open the cover and keep the pan with chicken in a side.
            • Now I will burn the chicken. So that I will take iron net, actually it is used for “roti” in India for puffed up. Use oil on the iron net.
            • Keep it on the gas oven and turn the gas on.
            • Add the fried chicken on it.
            • You can do this in a low or high flame.  If you do this in a low flame it will take more time to burn the chicken. While burning excess chicken spices will fall.
            • Burn the chicken all sides properly.

            Tandoori Chicken is ready. Serve it hot with chopped onion, Tomatoes, fresh Coriander Leaves and ½ pieces of lemon.


            tandoori-chicken-indian-recipe-at-home-without-oven


            Watch my favorite recipes:


            How to make raw mango juice? Health benefits of raw mango

            $
            0
            0

            How to make raw mango juice?

            A glass of cold juice brings summer freshness. And then I wonder if it is a raw mango juice. So today I will share raw mango soft drink recipe. This mango juice can easily make at home. What are the ingredients you need to learn the recipe and how to create raw mango juice?

            how-to-make-raw-mango-juice-health-benefits

            Mango is Tropical fruit. We know that the mango is called the king of fruits. It is available only in the summer period. Many things can be made with raw mango. Also green mango is amazing food with pepper, salt and pickle. In this sub-continent mango is most tasty fruit. Yellow is the color of ripe mango and green is for raw mango. There are about 35 types of mango in the world. There are several varieties of mango. For example fajli, gopalabhoga, khirasa, amrapali, Aruna, Mallika, Subarnarekha etc. People of all ages like mangoes. Most people prefer this fruit than any other fruit.

            Read more about homemade lemonade recipe and health benefits


            how-to-make-raw-mango-juice-health-benefits

            Raw mango juice:

            Ingredients for raw mango juice:
            • Raw mango 1
            • Sugar 5-6 tsp
            • Black pepper powder ½ tsp
            • Black salt (in Bengali “Bit Nun”) ½ tsp
            • Green chili 2
            • Salt ½ tsp
            • Water 2 glasses

            How to make raw mango juice?

            1. First peel the mango.
            2. After peeling clean the mango in fresh water.
            3. Now cut the mango into 6-8 pieces and remove the seed.
            4. Heat the pan and boil the mango pieces.
            5. Blend all ingredients in a blender and mix together.
            6. Serve with ice.

            Any fruit juice products, will try to take within 30 minutes. Then all the vitamins and other elements will be beneficial for health. If you do not take 30 minutes, collect and Keep it in air-tight containers to and then of course, will take with in 24 hours. After the 24 hours fruit juice is not accepted or good for health.

            Health benefits of raw mango:

            In earlier days, children would not have to eat raw mango. Eating of raw mangoes can create different types of diseases that are felt that time. The time changed. Now, people like to eat raw mango juice, pickles and much more. To analyze the Health benefits of the raw mango is a lot of talk. Raw mangoes are very beneficial for our body.

            Raw mango Health Benefits:
            Know the benefits of raw mango. Mango is of course a favorite fruit. People can not be found, who do not like to eat the mango. Eating of raw or ripe mango will be very beneficial for our body. In many cases, raw mango is beneficial more than ripe mango. It is to be really surprised to learn about the Health Benefits of the raw mango.

            • It has full of vitamins and Minerals.
            • It has full of carotene and vitamins, which helps to keep eyes good.
            • Beta-carotene helps prevent heart disease.
            • There are good amounts of vitamin B1 and vitamin II.
            • There are calcium and iron.
            • Regular exercise habits can eat raw mango. Lack of potassium can fulfill.
            • Due to large amounts of potassium and magnesium have a beneficial for acidity or heartburn.
            • Due to large amounts of iron it is quite beneficial for anemia problems.

            Disease Prevention:
            • It has full of fiber which is beneficial for constipation. Helps prevent colon cancer.
            • It prevents Cholera, anemia and tuberculosis.
            • Being rich in vitamin C, increases resistance to disease. Protect from summer insulation.
            • Crushed dried mango seeds are used to treat diarrhea.
            • The prevalence of diabetes can be reduced by using mango leaves.
            • It helps to solve the Kidney problem.

            Other Benefits:
            • There are enough carbohydrates.
            • Being alkaline foods, it works well to heal acidity.
            • Mango pulp or fiber helps keep skin bright.
            • Cut the mango into thin and keep it on the face and wash it off for a while.
            • Raw mango helps increase retention.


            Viewing all 105 articles
            Browse latest View live